FileMaker UI Tricks: Dual-Purpose Layout
Beverly Voth is guest posting at FileMakerHacks.com again, and has a great post about dual-purpose layouts. In this instance, the layout toggles between detail and list, using the Table layout to display (and print) the list:
FileMaker 13 & 14 have some features that can be leveraged to allow onelayout to toggle between Form View & Table View and look differently! We will be using the Starter Solution, “Contacts”. Feel free to download the demo file (Contacts14.fmp12.zip) or you may start with a fresh copy of the database file or another Starter Solution and follow the steps below.
NEW to Starter Solutions? Select “New From Starter Solution” under the File menu. Click the “Contacts” icon and click on the “Choose” button. A dialog will come up with the “Save As” field filled in with the name of the database file you chose. Navigate to where you wish to save the file and click the “Save” button. This will open the file to the default layout and be ready to change.
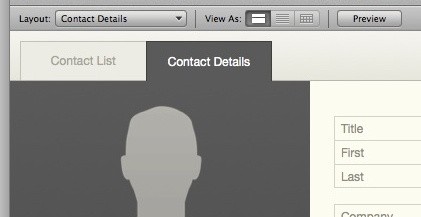
The default layout for Contacts is “Contact Details”, is in Form View and shows two “tab-like” buttons called: Contact List & Contact Details. These are buttons that Switch you to different layouts. Notice how the placement is the same and there is a smooth transition between the two layouts. You may also notice that the view is “locked” to just allow View as List or View as Form (respectively). You cannot select other views on these two layouts.
This is a great way to move back and forth from detail to list without having to change layouts. This example is not WebDirect friendly, however, so take care not to use it there.
There is an example file at the link, and detailed instructions for implementation.
Source: FileMaker UI Tricks: Dual-Purpose Layout | FileMakerHacks


August 28, 2015 @ 9:21 am
Nice trick.
I’m using SlideElements to scripttrigger gotoObject and GTRR scripts. For the user, it looks like swiping from one to another element. Actually, he’s switching from one layout to another.